Saturday 30 May 2009

A short lighting stand for about £3. Not everyone has a set of pipe-benders but there's not many plumbers who would refuse to knock this little gadget up for you for the price of a pint.
About one metre of 15mm copper pipe is all you need. The straight brass union is so I can add a much longer piece instead of that six inch stump making a normal hieght lighting stand for less than £5.
The swivel head costs £14 from Hong Kong.
A camera radio remote trigger for £14. What!!!
Okay, so it started life as a mere flash trigger from Hong Kong. I took a 'Cheapo' PT-04 TM flash trigger and soldered a mini-jack socket onto the side of the receiver. Steady now, this does effect any warranty!
Drilling a hole in the side involved being careful not to harm the interior circuits, same too with the soldering iron - don't leave it too long in contact with the board connections while tacking on the two extra wires linking new mini-jack socket to the original pair of wires going to the hotshoe.
There was a length of cable with a mini-jack plug on one end in a box of junk under the stairs amounting to about 5 metres long, pity it wasn't longer, but hey it was free! The reason I wanted it fairly long was that I can also use this same gadget as a hand operated remote via an ancient slide projector handset, (see last photo). This too needed the addition of a mini-jack socket.
With a small iron I soldered a second mini-jack, from Maplins, to the bare end of the cable and plugged it into the remote socket on the side of my Canon 400D. I have to admit that the very first time I did this with fingers crossed.
Now, with the wireless trigger receiver and camera linked, I can fire my shutter from around fifty metres. First press focuses the lens and second press fires the shutter. Exactly the same happens with the altered projector handset, focus, fire.
The second image here shows a polycarbonate base into which I screwed a 1/4" inch UNC (tripod thread). This gadget is not shown in it's best role which is as an ultra short free-standing hotshoe flashgun support.
Price of these gadgets:- polycarbonate from a glazing merchant costs £1, tripod head from Jessops at £12, mini-jack socket £3, cable freeby, Radio trigger £14 plus postage at another £6.

Monday 25 May 2009

Making and using a DIY colour balance card is not as hard as you might think.
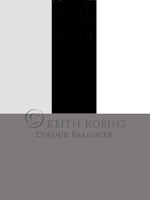
These is no reason why you cannot use a colour balance card you've made yourself in Photoshop. Come to think of it why not use this one? Simply copy, paste and then print.
I wanted two products in one, a quick and positive custom white balance checker, plus an exposure indicator. It was because of the later that I went for 50% grey instead of the traditional 18% grey.
Dividing the image into four I filled each rectangle with black @ 0, the shiney white @ 255, the matt white @ 225, and the grey @ 126.
Let's deal with the exposure side of things first. Take a photo of the balance card, bring up the image along with a histogram and see whether you have one peak on the left, the black - two peaks on the right, the two whites - and one peak in the centre, the grey. If all the peaks are off centre towards the left it's under exposed, if they're off to the right it's over exposed.
Okay, so you have an image which appears well exposed. Now go to the menu on your camera and find the Custom White Balance setting, press Okay, (or Set on some cameras), and the last image you took, the colour balance card, should come up on the screen.
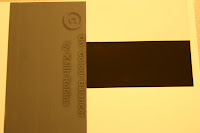
Chances are this image will be looking a little off colour like this yellowish one above, which is the result of using a daylight setting under tungsten lights.
At this point my Canon 400D displays a 'Custom' icon in the top left-hand corner of the screen with the word 'Set' beside it. Press the Set button and an orange warning notice will flash up saying 'Set WB to Custom'.
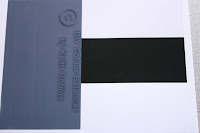
Now press either the Menu button or half press the shutter button before changing the 'AWB' to 'Custom White Balance'. If you're like me you'll now take another picture of the balance card so you can double check the results, which should resemble the next correctly balanced image below.
Even if you turn off or change the camera battery this custom setting will remain valid, but only for as long as the lighting remains unchanged.
If the sun goes in, or the hour gets late and it's well into sunset, or you move from open shade to an area where overhanging trees create a different coloured shade, then you'll need to set up the custom colour balance all over again, although it doesn't take any more than a couple of minutes.
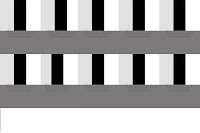
In an effort to keep my camera bag tidy I've printed off the last image here and cut the print into strips of two, just to keep them clean.
This idea has kept me on the straight and narrow for over a year now, all I have to do is remember it's in my bag, and that I need to set the white balance onto Custom after I put my card away.
Happy button pressing from Keith.

Sunday 24 May 2009

A flash bounce card for nothing!! A full on flash gives harsh shadows which to say the least appears unflattering in any portrait. This is where a flash bounce card can come in handy and if you can make up one for nothing then there's something left over for a graduated filter, or better still, a second flash, or maybe a faster memory card.
Most milk cartons are translucent plastic and you'll loss a fair bit of reflected light, but a Cravendale milk carton is virtually a solid, photographic, white and won't upset your daylight colour balance. Okay, so you're probably still on auto white balance, we'll discover how to control that in an upcoming post.
The part of a recycled 4 litre milk carton opposite the handle makes a superb reflector, is easy to fold, retains is shape and tucks neatly into a camera bag while still attached to the flash head with a rubber band. In use it wraps the flash around a plant giving an amazing backlighting effect. A typical exposure would be around f11 at 1/16th flash power, plus 1/200th of a second to make the background really dark, or as low as 1/30th yet still not need a tripod. In the photo you can see the stability benefits of those slivers of wood glued to my Vivitar 258hv. Just discovered this link where these fantastic gun are still available and although the quality did drop for a while they are now much more reliable. Another gun worth looking at is the LP120 from the same suppliers.
Did you know that 'For Sale' signs are made of Corex board? These are extremely useful to us strobists as flash lighting modifier grids. When you want only a small part of the scene to be lit by your hotshoe flashgun you could use a snoot. An early DIY snoot for me consisted of a piece of white mountboard folded into a retangular tube which restricted the output to a small pool of light. The trouble was this twelve inch monster took up a lot of room in my camera bag.
A month later I discovered an alternative, a grid! Creating my first grid took an hour of cutting out strips of Corex board about three inches by half an inch and sticking them together with double sided tap, then trimming the whole thing until it slots into the reccess of my Vivitar flash window.
What happens now is the light has to travel down lots of tiny square tunnels, okay, so these tunnels are only half an inch long, but they do tend to do a very similar job to a twelve inch snoot without the space consuming size.
I didn't really go around cutting bits off the edge of 'For Sale' signs, mine came from a local recycle center for the princely sum of 10 pence, which was for enough to make fifty grids!
Flash photography needn't be expensive. This little second gun setup cost just £30 plus a bit of imagination. The old flashgun was registering 84 volts, far too high for my digital camera which should only be handling 6 volts and under.
Radio triggers are also vulnerable, although the voltage limits are slightly higher, hence I'm still use a tiny slave unit from the 1970's costing £5 new on my second gun. A modern slave is not much more expensive now, according to this website, so I'll be treating myself someday soon.
The short sync lead at just 30 pence consists of a mini-jack plug soldered to an oldfashioned pc sync connector and even this DIY adaption harks back to the 1980's.
The plastic mechanism of three of my old Photax lighting stands are now held together courtesy of pieces cut from a wire coathanger holding the legs in place, these robust old stands cost all of £19 each 25 years ago but were worth it, although without the wire repairs they would probably have been scrapped a fair while ago.
£1 for a DIY plastic flash bracket complete with swivel and a brolly shaft hole was a bargain and has served me well since 1976. However, the modern equivalent, a Lastilite Tilthead Adaptor costs £16 plus postage from Warehouse Express and is far superior.

Friday 22 May 2009

Why are there bits of wood glued to my Vivitar flashgun?
And what's with the elastic band? I wanted to fit a DIY reflector to my 285hv, but it kept falling off due the flashhead design. Three slivers of wood, a tube of Araldite Rapid and the area which supports any sort of reflector is increased.


Take a piece of white mount board and cut out your reflector with a pair of scissors, then fold it as per the image here. I have tried sticky tape to attach it to my gun but it soon became messy, hence the elastic-band plus a small blob of BlueTac between the base of my home made bouncer and the rearmost strip of wood reduces any movement.

The softening of my flash photos came out so well that I made a much stronger reflector out of a ten litre emulsion paint bucket lid. But, as this over engineered item refuses to fold into my camera bag comfortably I keep it for studio use and I now use a far more flexible portion of white milk carton for on location shoots. A section cut from a four litre Cravendale seems to be a good size and folds neatlyinside my camera bag while still attached to the flashgun.

There is something else glued to my Vivitar flash head, a small block of plastic which is sort of hotshoe shaped. A flash used together with a radio trigger receiver means the flash tube is positioned about 200mm above the stem of a shoot-through brolly - result - poor coverage.
The plastic plate fits beautifully into the hotshoe lighting adapter I bought from Hong Kong for £16. When the box arrived it also included a free 450mm diameter shoot-through brolly. Of course with such a small brolly the flash head peeped over the edge once the trigger was attached.
The last image here shows a temporary strip of Velcro holding the brolly stem in close to the flash tube, it was the only way I could use the flexible adapter without a more permanent solution.
After this experiment I made the flash shoe plate and glued it on to the top of my Vivitar. Now I can use the flexible adapter with its brolly shaft hole and keep the flash head really close so I get full coverage of the brolly, yet still retain the radio trigger function. Must get round to Aralditing hotshoe plates to all my other guns at somepoint.
This hotshoe to lighting stand adapter will fit most lighting stands, or a tripod screw thread, or it'll fit onto a piece of 15mm copper pipe bent to form a really short lighting stand, (ideal for illuminating backgrounds). The hole for a brolly shaft, (in pink), is set at a slight angle enabling the flash to reach maximum coverage of the reflective material.
There's also a thumb-turn flexible joint so your flash brolly can be altered to a wide variety of angles. The £14 radio trigger receiver is indicated in blue and the swivel joint of this superb hotshoe flash to lighting stand adapter is indicated in yellow.

Thursday 21 May 2009


Make a reflector from a Walkers crisp packet.
A small reflector which fits most camera bags can be modified from a Walkers crisp packet. Turn it inside out and simply put your hand inside to bounce light back into the face for a portrait shot like this one taken by my friend Dave Thomas. Dave is new to strobists methods but he's keen to learn and emailed me these two shots taken during a field trip with MidSomerset camera club.
My crisp packet has the lid of a margarine container inside to stiffen it. Okay, so it could be larger, like for instance using a family sized crisp packet, but I just happened to have the smaller one in my pocket.
Holding a flashgun at arms length is pretty standard for me and is something I've done for 30 years, even before I took up cave photography. Look on it as being similar to using a fog light to increase the 3D effect and give more texture. It probably stems from not having a hotshoe on one of my cameras as a youngster. Yes, I've been involved with photography since 1964!
I'm holding a Vivitar 285HV in these shots which is set on 1/16th flash power resulting in an aperture of f11.
To make the sky appear darker than it actually was Dave increased the shutter speed to 1/200th of a second and kept the ISO at 100. He could have used a speed of 1/30th and still got an acceptable shot and although the sky would then be a lot lighter it would still result in a good picture with my face being expose exactly like is is at 1/200th.
Some club members are finding it difficult to grasp the techniques involved with using a flashgun when there is also available light present, whether it's daylight or tungsten floodlighting. The main thing to remember is that your shutter speed controls the available light - while the aperture controls the flash intensity.
In all other lighting situations if you lower the shutter speed it is necessary to increase the aperture - as if the two controls are holding hands. However, bring a flash into the equation, along with a secondary source of illumination, and the two are free to lead completely separate lives, leaving you in total control!!
Aperture = flash control.
Shutter speed = daylight control.
And don't forget that although manual settings over-rule these two obvious settings, do make sure your camera hasn't accidentally gne into Auto ISO settings, which will spoil everything you're trying to achieve.
THE CHALLENGE OF FLASH VERSUS DAYLIGHT by Keith Robins

Trying to sync your camera with a flashgun means the shutter speed needs be less than 1/200th of a second, or 1/250th on a few cameras.

For most cameras if you go higher than this top sync speed a black bar begins to appear at the bottom of your image area. This is caused by the second shutter curtain already starting to cover up the sensor before the first curtain is fully open, which is when the flash normally fires. The flash must fire while the whole sensor is uncovered - 1/200th or less to be on the safe side.

The shutter curtains always travel at the same speed, regardless of what shutter speeds you've set - at 1/1,000th of a second there’s a gap of only five millimetres travelling down across the sensor. Flash strength is controllable by four methods which relate to each other:- the aperture (also known as the f number), the ISO seting, the flashgun power setting or the distance away from the subject.

There is a fifth camera control, the shutter speed, but this has no effect whatsoever on the strength of your flash and how it lights the main subject you are photographing. Whay it does control is any daylight / available light, such as a floodlight, illuninating a part of your picture.

Take a portrait outdoors on a dull day and brighten it with your automatic pop-up flash while the camera is in program mode and the chances are the background and face will both turn out correctly exposed. Sometimes though, we might want to be much more creative by getting away from the auto settings - a bit like growing your own veg instead of visiting the supermarket.

So I’d like you try something for me - set your camera on manual aperture and shutter speed, change the speed to 1/200th of a second and the aperture to f8, then take that same portrait again. Even with a pop-up flash you can experiment with the daylight by altering the shutter speed down a few stops. Does the background become lighter?

If you try this with an off-camera flash, connected to the camera via a modern ETTL coiled lead, both the camera will talk to the flashgun and automatically alter the strength of your flash lighting. Your pop-up flash will also be controlled by the camera’s aperture, even though the camera is set on manual, but hopefully you’ll notice a difference. Now move the shutter speed back up. Does the background become darker while the flash lighting on the subject remains exactly the same strength?

However, if you try this with your modern flashgun set to manual, or even better use an older flashgun using an old-fashioned pc sync connector, the equipment will still fire okay but the camera will no longer be able to tell your flash that it should be altering the exposure automatically - you end up in total control of the exposure! It's possible to make that same portrait have a fairly dark sky, maybe even so dark that you think it’s going to thunder down any second.

By using your camera and flash in manual mode you can create any mood you want, from dark and gloomy to bright and cheerful. The background is changed from light to dark by going to a higher shutter speed and made to go brighter by going for a lower shutter speed. Meanwhile your suject lit via the flashgun remains exactly the same intensity. If you can grasp this you have conquered the technique!

Assuming you’re using a fairly high aperture, (ie:- f11) the shutter speed is able to control all continuous light to the extent that it becomes virtually black at 1/250th. Or you might wish to use 1/8th to create slow-motion blur of the background yet the main subject remains relatively frozen due to the flash going off at around 1/500th on full power up to 10,000th of a second using one of the auto settings of the flash.

Meanwhile Beware! Some older flashguns can produce quite a high voltage at the contacts capable of frying your digital camera. There is a saviour, a little gadget called a Wein (just Google it in), which reduces voltages down to less than the safe 6 volt limit. A Wein costs £45 while a radio trigger from Hong Kong is less than £20 including postage. (Google in radio flash trigger).

I was lucky enough to purchase one of the new Vivitar 285HV flashguns before they went bust. These wonderfully versitile guns give out only 4 volts - there are four autosettings - four manual settings, plus a tug-out zoom lens with three ranges. All in all one of the best investments I’ve made, especially at the cost - £49 from John’s Cameras in Hong Kong via the internet. (The British suppliers were always out of stock for some reason). I am now in total control of my flash photography! There is a saviour in the shape of an LP120 available via MPEX in America - view info on these at Strobist.

I recently discovered that little flashgun grids are available which act similar to snoots. This promted me to make a ten inch snoot out of scrap photomount board, which lit up a fuzzy edged rectangle on a church wall from over a hundred feet! I’ve since made a tiny, more camera bag friendly, grid by gluing strips of Corex board together (cut from an old 'For Sale' notice) and can now focus all the flashgun’s power into a head and shoulder portrait sized area from fifteen feet - also useful for side-lighting flowers against a dark background.

Do you have to mathematically work out which aperture / shutter settings to use? No! After the first few times of using trial and error as your guideline it will become second nature. However, I did suffer a slight hiccup when about fifty shots were spoilt due to my ancient pc sync leads playing up, they needing resoldering. After the forth times of resoldering those pesky wires I decided enough was enough and binned the old sync connector. I’ve now got a remote flash trigger that doesn’t play up and I’m having so much fun exploring the world around me via flash mixed with daylight without any wires dangling ready to be tripped over. The scope for new photographic ideas combining the two forms of lighting is virtually endless.

All this must seem rather daunting when you first start using a flash outdoors, so I suggest you read this article and try a couple of experiments. It costs only a few pounds to purchase an old styled flash via Ebay, whether it’s pure manual or has a few auto settings doesn’t matter. So take the plunge, lash out the price of three pints for a cheapo flash and start exploring the enormous range of possibilities. Of course if there is a modern Canon 580EX languishing at the bottom of your camera bag and it's still in its cellophane wrapper, maybe now is the time to break it out and change the style of your photography, for the better.

The chart below shows the five variables which control an exposure when using a digital camera. The first four columns effect the strength of your flashgun and each setting is equivalent to one stop.

Shutter speeds only control the daylight / background, they have no effect at all on the flash stregnth.

ISO

F No’s

Flash

gun

powers

Flash distance

in metres

Shutter speeds (These do not effect the flash side of your exposure in any way)

100

f4

1/64th

2

1/200th of a second

200

f5.6

1/32nd

3

1/100th

400

f8

1/16th

4

1/50th

800

f11

1/8th

6

1/25th

1,600

f16

1/4

8

1/13th

3,200

f22

1/2

12

1/6th

6,400

f32

full power

16

1/3rd

Tip for advanced users - Turn your camera upside-down for sync speed of over 1/250th. The sky will hide the black bar which normally grows from the bottom of image at higher shutter speeds.

ISO’s increase by doubling the previous number and each is one stop more sensitive.

(Watch out for Nikon's nasty habit of going into Auto ISO settings just when it’s not needed.)

F numbers have a weird method of ascending where alternate figures are doubled. This can help when using a flashgun’s guide number to work out distances. (Double the distance = half the F number). The higher the F number the less light reaches your camera sensor.

Flashgun powers are fairly logical, each number equals one stop. (Although some guns try to fox you by going up in one third increments) You can also use the flash zoom to control the strength ie:- 28mm is about one stop weaker than the 80mm setting.

Distance. To calculate your F number, divide the flashgun’s guide number by the flash to subject distance to reveal the correct aperture. Forget the old fashioned 'Inverse Square Law' in relationship to altering the flash to subject distance, your aperture numbers have already done the maths for you. Twice the distance equals two stops, which, strange to say, means f16 become f8. That is so simple, double the distance = half the actual f number, it's what guide numbers are all about and is why they seem to make no sense.

Guide number divided by distance equals F number. Guide number divided by F number equals distance. On the back of your flashgun multiply any distance by the F number next to it and you should get exacty the same guide number

The guide number for a Canon 430EX flashgun is 43 in metres, divide this by four metres and F11 is a good starting point, as long as you’re using ISO 100 and the flash is in full auto mode and the flash zoom is set at about 50mm. Move away from the subject to eight metres and you’ll have to drop down to F5.6 which is half of F11 (8 X 5.6 = 44.6 which is so near your guide number of 43 it’s unreal!)

Should your flash be too strong, reduce the aperture by going higher on the aperture scale, go down the ISO scale (both of these lessen the sensitivity), or move the flash further away. Alternatives are a couple of fingers across the flash lens, or a layer of white cotton hank is equal to one stop while two layers will equal a two stop reduction in flashgun output.

If your flash is too weak and you can’t go any lower in the F number department, move the ISO setting up, or move the flash zoom head out to a telephoto setting, or move the flashgun closer to your subject.

By now you should be feeling like you know more than you did an hour ago. Time to go out and try a few experiments. First off explore some of the variables of flash by lighting a couple of flower heads on a window cill where you can vary the shutter speed to control the available light behind them, then try it with some close-ups in a hedgerow before going for a portrait against a setting sun. Try making the clouds look really dark and threatening by controlling the flash and daylight seperately. This is done by leaving the aperture set for the flashlit subject and altering the shutter speeds which change the strength of the available light. Now try portrait work using daylight as the main source and fill in the shadows with a flashgun.

There is a method of filling in shadows, called the Monte Zucker technique, which is used mostly in film and video work, but it's just as applicable to us digital photographers. Imagine a length of string passing right through both model and photographer, keep the sun and the fill flash on the same side of the string and the resulting lighting looks so natural that few will be able to tell where sunlight finishes and the flash takes over. Taking this one step further involves placing a large reflector on the other side of the string to continue wrapping the flash / sunlight around the models face / shoulders / torso.

I hope this article has given you food for thought and that you persevere with the techniques of flash / daylight balance. I belong to two camera clubs, Yeovil CC and MidSomerset CC. where I help others learn as much about flash work as I have discovered over the last thirty years.

Tuesday 19 May 2009

World's smallest, simplest and cheapest flashgun!
Remember the old fashioned Magicube flashes that sat on top of a Kodak 110 mini instamatic camera? They were surprisingly powerful, equal to a Sunpak GT32.
Inside a Magicube is a tube full of oxygen which when tapped by the internal spring would shoot up and mix with the zirconium foil in the glass orb and instantly give off a really bright light. 180 degree spread of light lasting about 1/30th of a second, just right for illuminating a waterfall but without freezing the moving water, brilliant! With a guide number of 80 in feet at 50ASA, because that's what 200 comes down to when underground, this was one of the most powerful guns available without going overboard with the costs. Remember, this was the late seventies and almost everyone was on the breadline.
The little alloy plate and galvanised sheet tin holder / trigger cost less than fifty pence and took me only an hour each to make. All three of us in the AVRG cave photography group had one or two and is what most of the caving pushbike was lit with.
This was back in 1978-82 when over a four year period I went caving 400 times and took one roll of film each trip. I can hardly believe that I ended up with 15,000 slides on Ektachrome 200. Being a self develope film the costs were kept to a minimum at £19 per hundred foot roll, enough for twenty times thirtysix exposures. Add on the tiny expense of a developing kit, plus hours of fun chattering and twiddling the films in their tanks, sometime three at a time with the chemicals being poured from one tank to another. We talked photo and took photos and there was little time for anything else, but then, what other hobby is so versatile in the areas into which you can lose yourselves for hours on end?
Obviously there was great excitement as super picture like these were revealed after fifty minutes of twiddling. God, it's fantastic that nowadays we can download five times that number and see the results straight away and print them off before an old slide film was anywhere near dry.
The hieght of our cave photography was taking a pushbike down Swildon's Hole on the Mendips. This was to be for an audio visual to show at the Bristol University caving conference. Once word got out the main lecture theatre was bursting at the seams with almost double the fire safety recommended numbers crammed into every corner, even sat on the stairs because they'd heard of the content. What!? Took a pushbike down through Swildon's!!! Definitely our happiest hour!
I'll be trying my best to put this AV on the net and let you have the link as soon as I can.


Fifty foot flashgun trigger for less than twenty quid including postage from Hong Kong. Absolutely the best gadget for using an off camera flash ever!!! I've just sent off for a second one so I can fire two flashes without having to resort to a mini slave unit, which don't always work 100% when working near sunlight.
Ebay has plenty of these triggers listed, just make sure it is a radio trigger and not infra red operation as these can cause problems outdoors. Go to :- John Camera Shop
You get two AAA batteries with each trigger but they don't last long (about 500 operations before they're flat - you'll notice this when the working distance starts dropping dramatically) Duracells should last for several thousand flashes. There's a fairly rare battery in the transmitter but Googling in the details finds a replacement without a problem.
After using this for a few months and finding that the working limit really is about fifty metres I took a soldering iron to the reciever, added a mono mini jack socket, made up a 5 metres lead and can now use the transmitter to fire my camera from over a hundred feet (useful for birds / wild animals / motorsports etc).
The first press focuses the camera and the second press fires the shutter. Am having great fun with this setup as you can see by my self portraits.
Inside the top of the reciever are two wires connected to the hotshoe. I joined both of these to either side of the mini jack socket and can now use still use it for either flash or camera, obviously not both at the same time or your flash will go off before the shutter is fully open. I've not set this up alongside a speed camera, yet, but you could have some fun and maybe save a life by giving it a whirl.
You'll have noticed that the hotshoe only has two contacts so it works my Vivitar 285HV no problem. Those of you with a Cannon 580 / 430 or a Nikon type flash would have better results by slipping in a piece of plastic from a sandwich or cake casing available from your supermarket, or use a section of milk carton. Cut out a tiny square with a hole in the centre for the middle contact of your ETTL / TTL flash, into the hotshoe before fitting in the gun.
I'm guessing that you are by now beginning to get the hang of using your flash and camera both in manual mode as us strobists do, if not I will be posting up how you can learn this fascinating technique soon as time permits.

Saturday 16 May 2009


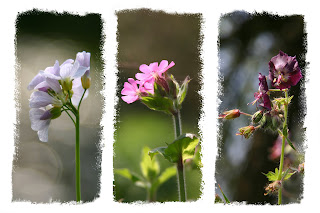
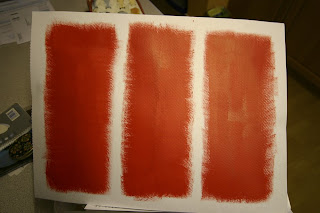
Make your own triptic frames. I found some almost dried up emulsion in the shed along with a few sheets of rough textured art paper. Using a short haired brush I roughed out three red rectangles and photographed it.
Okay I should have scanned it but some things are so simple that I forgot that it's possible to scan these sort of things.
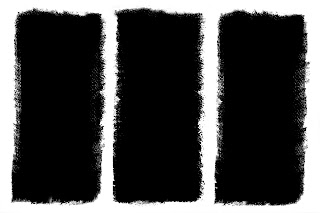
Going into Photoshop I opened the red image, went to levels, selected the Red channel and turned it near enough black. Back into RGB channel and clicked on the White and then the black eyedroppers to get my pure black triptic.
When you turn the Layer Mode to Screen the black still looks black, but really it's only an opaque window until another image is placed behind it. Now go looking for some suitable pictures.
The flowers seem to work better than some of my vintage vehicle images.
Bring each new image into Photoshop, move it down in the layer stack to below the black rectangles, then move it around until you have a satisfying result. Bring in the next image and do the same. If two of the images overlap in a window use the rectangular selection tool on the piece you don't want, hold down Control and the C key, which is Cut. This takes away the offending area. I use Cut so that if I make a mistake I can Paste it back in and have another try.
Why did I use red paint? It was the darkest emulsion in my shed.
For those who have no paint or no shed, click on the black triptic, save my image to your files and use that to experiment with this impressive technique.
You might also decide to make a greetings card by placing some text in one of the windows on top of, say, a gaussian blurred image of a plant.

Thursday 14 May 2009


Land yacht with a difference.
Here's a photo of my dad (in the boat and note the steering wheel which operates the rear wheel) and Uncle Tony pulling him on the way from Yeovil to Ilchester for a spot of sailing on the river. Picture was taken by one of their "Runners", a sort of hanger-on, of which they had quite a few. Runner would race alongside with a camera, spanners etc, just so they could feel involved in some of the lunatic DIY things my family got up to - funny thing is it's been very similar with me and my friends. It's wonderful being eccentric! Must see if I can find those pictures of dad and his homebuilt glider - meanwhile have a look at this litle youtube video of dad's propellor car in the early fifties. It was originally shot by Pathe News and shown at the Odeon in Yeovil and I can remember standing next to it during a photoshoot for the Western Gazette.
Take a look at Dad's unusual three wheeler here.
Growing up with access to all sorts of wierd and wonderful tools unusual gadgets must be what made me a sort of inventor come eccentric. I too had a pushbike with a steeringwheel, a hundred and ten mile and hour three wheeler, a motorbike and sidecar on which I tore around on two wheels. I've settled down now though, but am still inventive and curious to know how things work, which is why I'm so into photography with it's many facets and opportunities for gadgets and adaptions.

Wednesday 13 May 2009


A bit of flash - daylight balance.
This is more like it! Settings were 1/250th at f11 and 200ISO. My £50 Vivitar 285hv costing fifty quid was turned down to 1/16th power at about 18 inches. One small addition was the DIY grid made from an off-cut of a corex "For Sale" sign. I cut slices about 12mm thick and stuck then together with double sided sticky tape, then trimmed the outer edges to be a snug fit in the flash window of the Vivitar. This inexpensive grid casts a pool of light about 10 to 12 inches across at 18 inches distance.
As I've not had much luck with flash leads I've now got a radio trigger from John Camera Shop in Hong Kong costing £14 and it works beautifully from five inches up to fifty metres! Go to John Camera Shop (The trigger is on page two)
I've since taken a soldering iron to the reciever of this trigger and added a mini-jack socket so I can also fire off my camera from fifty metres, which in turn fires off the flash via a second radio trigger fitted in the hotshoe. I'll put a post up soon along with a couple of photos of that adaption.

Silhouette shots have always been popular and despite the branches intruding slightly there's still a lot of impact with this shot. I exposed for the brightest part of the sky and then closed down one more stop,or maybe even two stops. Of course you don't just take oneshot in situations like this, you take ten and keep changing the subject position, the camera position, or alter the camera settings. There is never a perfect exposure for something like this, but you soon learn what works and what doesn't. In case you're wondering, Dave Thomas is wearing a woolly hat - he wished he'd worn kneepads like me after kneeling on a thistle.

I surprised myself with the exposure for this one - 1/2000th sec at f11, probably because I was using 800ISO.
Coombe Woods is okay regarding footpaths and parking, but I was into video for a number of years and find it difficult to get away from the "Tiny details make a better story" type of photography. Maybe I did miss a few really good "general view" styled shots, but I'm more than happy with my results of this dandelion head. I was handholding the camera with my head in the stinging nettles and loose change falling out of my pockets as I wriggled and rolled into position so a lighter patch of sky was right behind the plant. 200mm Canon lens.
This is at Coombe Woods near Street, Somerset.
I love this style of flower photography! There's a certain calming feeling about plant photos where the stalk gradually merges into the background before it reaches the lower edge of the image frame. By using f8 to f11 at about three feet the depth of field is around pretty good at between 12mm to 16mm, yet still allows all else to go out of focus. There were a few strands of grass which needed trimming and a thistle prickling my behind, even though I was wearing a boilersuit!
Canon 400D, 28 - 200 lens, F8, 800ISO, 1/250th sec. Why did I use 800ISO? I can't stand using a tripod, too restrictive. I was lying down on my side with camera about two inches off the ground. Without a tripod I'm only there a couple of minutes, whereas a tripod would have added another thirty minutes to each picture. Meanwhile the sun is on its way down, fast!

Friday 8 May 2009

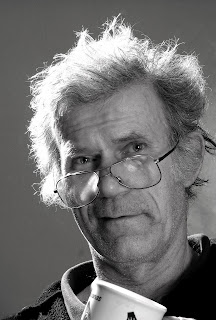
Self portrait of Keith Robins, strobist and tutor of YeophotoGroup.
Main light is a £55 Vivitar 285hv from Hong Kong with DIY Corex board grid costing just 10 pence over my right shoulder. Fill-in flash is an ancient Starblitz 3000bt bounced into a Lastolite white reflector from low down. f11 - ISO100 @ 1/30th to record the daylight on the background. If a darker background was required I would have turned the shutter speed up to 1/200th or even 1/250th.
To fire the camera shutter I used a Canon wireless shutter release, which unfortunately only works from the front and has a limit of about ten feet. It is possible to use one of these gadgets from behind the camera by bouncing the infra red signal into a Mr Kipling mince pie dish stuck at the right angle on top of a Canon with Bluetac.
A £14 radio trigger fires the Vivitar and a 20 year old slave operates the Starblitz. And yes there is hot tea in the mug, it's just visible in the reflection in my glasses! This was the third shot out of about fifty - must have fell asleep with my finger on the trigger!
How to convert one of these cheap radio triggers to operate a Canon camera is posted on a newer blog.


Keith's Keyboard Shortcuts. Most of these will work in Photoshop Elements 4 upwards, plus CS, CS2, and CS3.

D = Background and Foreground default to pure white and black.

X = swaps Foreground and Background colours. (Ideal when painting in Layer Masks)

M = Marquee selection tool.

Q = Quick Mask

G = Graduated filters

Alt + Backspace = fills the selected area with the foreground colour. (Great for silhouettes!)

Control + Backspace = fill the selected area with the Background colour

Shift + Move tool to centralise an added image

Control + A = Selects all

Alt + Backspace = fill the selected area with Foreground colour

Alt + Layer Mask icon creates a black mask you can see through (Reveal All) - white paint to hide.

X key to alternates between Foreground and Background to correct with black paint.

Control + Alt + C = canvas size / resize dialogue box.

Create New Layer icon = inserts a transparent new layer above the highlighted existing image

Control + Create New Layer icon = inserts a transparent new layer below the highlighted existing image.

Control + J = inserts a Copy layer above the highlighted existing layer.

Control + Shift + J = creates a transparent new layer containing just the selection, plus it turns the selection in the original layer transparent.

Control + D = de-selects the existing selection.

Control + O = Fit To Screen

Control and press the + (plus) key makes image zoom in closer, bigger

Control and press the - (minus) key makes image zoom out, smaller

Double click on the Hand tool = fit to screen

Double click on the Zoom tool (magnifying glass) = view at 100%

Control + H = hides selection lines (to view the finished effect as you’re making adjustments) Control + H to bring the selection lines back again, (otherwise you’ll be wondering why you can’t pick up any other tools)

Control + X = selection goes Transparent, to see the next layer down through what is essentially a hole.

Control + X also = Cut

Control + V = Paste

Control + C = Copy

Control + Z = goes back one step at a time, as many times as you like in the History palette.

Control + Y = goes forward one step at a time, as many times as you like in the History palette.

Control + U = Hue & Saturation dialogue box.

Control + C = Copy.

Control + V = Paste

Control + S = Save.

Control + T = Transform (hold Shift to keep width / height ratios while dragging a corner box during resize)

Control + Alt = Transform but it’s on a separate layer not the original.

Free Transform too big to see? = Control + 0 to see all four corner handles.

Using the Brush tool? = Right click to bring up the brush palette for Hardness and Size adjustments

Adding more area to an existing Selection = Hold down Shift and make additional selection which merges with previous area.

Removing an area from an existing Selection = Hold down Alt and select the area you don’t want included in your selection.

Increase your Canvas Size - go to Image - Canvas Size - position the Anchor square where you want your image on the new canvas - tick the Relative box - enter the required amount of increase in inches, centimetres, or pixels etc - click OK.