 Making and using a DIY colour balance card is not as hard as you might think.
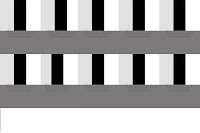
These is no reason why you cannot use a colour balance card you've made yourself in Photoshop. Come to think of it why not use this one? Simply copy, paste and then print.
I wanted two products in one, a quick and positive custom white balance checker, plus an exposure indicator. It was because of the later that I went for 50% grey instead of the traditional 18% grey.
Dividing the image into four I filled each rectangle with black @ 0, the shiney white @ 255, the matt white @ 225, and the grey @ 126.
Let's deal with the exposure side of things first. Take a photo of the balance card, bring up the image along with a histogram and see whether you have one peak on the left, the black - two peaks on the right, the two whites - and one peak in the centre, the grey. If all the peaks are off centre towards the left it's under exposed, if they're off to the right it's over exposed.
 Okay, so you have an image which appears well exposed. Now go to the menu on your camera and find the Custom White Balance setting, press Okay, (or Set on some cameras), and the last image you took, the colour balance card, should come up on the screen.
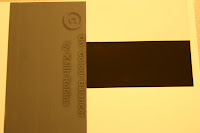
Chances are this image will be looking a little off colour like this yellowish one above, which is the result of using a daylight setting under tungsten lights.
At this point my Canon 400D displays a 'Custom' icon in the top left-hand corner of the screen with the word 'Set' beside it. Press the Set button and an orange warning notice will flash up saying 'Set WB to Custom'.
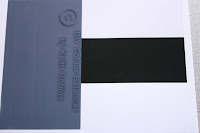
Now press either the Menu button or half press the shutter button before changing the 'AWB' to 'Custom White Balance'. If you're like me you'll now take another picture of the balance card so you can double check the results, which should resemble the next correctly balanced image below.
 Even if you turn off or change the camera battery this custom setting will remain valid, but only for as long as the lighting remains unchanged.
If the sun goes in, or the hour gets late and it's well into sunset, or you move from open shade to an area where overhanging trees create a different coloured shade, then you'll need to set up the custom colour balance all over again, although it doesn't take any more than a couple of minutes.
In an effort to keep my camera bag tidy I've printed off the last
 image here and cut the print into strips of two, just to keep them clean.
This idea has kept me on the straight and narrow for over a year now, all I have to do is remember it's in my bag, and that I need to set the white balance onto Custom after I put my card away.
Happy button pressing from Keith.
