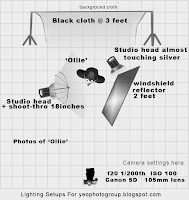
 Taking photos of drips takes time and patience, plus a little bit of know-how. For instance, try lighting whatever is being reflected in the water and not the water. In fact keeping the water in the dark is probably one of the best tips I can give you.
Try firing a hotshoe flash across the liquid's surface and lighting up something as simple as a reddish coloured festive dinner mat, a photograph from an old TV Times, or a pale yellow toughened glass cutting board, which are the items I've used in these three examples.
This is a technique I learnt underground during my caving days. (Goodness me, that's nearly 30 years ago!) Keeping the water dark always returned better photos than when the flash was pointing directly at a dark muddy pool and backlighting came out far better for moving water shots. Ripples also showed up better with backlighting, or when reflecting a cave wall or a caver is beyond and carefully lit so there is something tangible to show up as a reflection.
 Camera settings of 1/200th or slower takes care of the flash side of things while an aperture is chosen to go with the flash power setting.
By reducing the power to 1/16th the duration of your average hotshoe flash is reduced to around 1/5,000th, which is plenty short enough to capture the fastest of drips. Surprisingly, the aperture is still up around the f5.6 to f11 mark, even at 1/16th power.
These ultra-fast flash durations, requiring reasonably wide apertures, dictate narrower depth of field so focusing has to be spot on.
I set the camera on manual focus and zoomed in on the markings of a steel ruler which was right under the drip, then pulled the zoom back and framed up.
A tiny pin hole in the base of the plastic bottle is necessary to allow a drip at around a two second interval, just about slow enough for a battery powered hotshoe flash on reduced power to recycle in time for the next drip. It's easy to get carried away and take hundreds of photographs once you've started capturing good shots
 The idea is to count the drips out loud and nod your hand up and down in time. In your hand is the shutter release for your camera and your thumb is also keeping time with the count, but only actually pressing the button every other drip, (flash tubes can overheat with fast repeated use). Keep an eye on the camera preview screen and adjust your count very slightly to capture drips in different stages of falling and splashing.
Within ten minutes you should be getting pictures like these. Of course all the kit takes a while to find and assemble, plus the setting up takes an hour or so. Even finding a pair of pliers and a needle to pierce the bottle took me over twenty minutes!
Hanging your bottle from a lamp shade with a rubber band and clothes pegs works surprisingly well. And if you can't find a large black seed tray then maybe a bin liner dipped between four lengths of wooden batten will probably last long enough for this exercise. A cat litter tray will do, but watch out for unexpected puddles from Tiddles.
 Does the floor get wet? Yes, but not much. Is this exercise time well spent? Yes, most definitely! Telephoto lens? 60mm to 105mm is best. Mirror lock up? No, the flash is way too fast. Coloured water? Not neccesary, just rely on the background that you're lighting to give you all the colour you need. Angle the flash from one side to reduce glare in the reflection. Also angle it slightly upward to keep the water dark, we want backlighting only via bounced light. With the flash set to manual extend the zoom to avoid stray light touching the water. Keep checking the front of your lens for splashes.
 This last image shows a short length of four inch soil pipe as a support for the flash, a toilet pan connector is holding the magazine along with a pair of enormous clips from the garden. The magazine is sagging, which I deliberately left to illustrate how nothing has to be spot - on except the exposure and the focus.

